Best Flash Converter for Mac
If you ask anyone the best way to share videos, they will most likely say YouTube. The answer is no doubt right, for most regular users. However, if you have your own website or blog and you want to stream videos that are totally yours (your own video, your own Flash player and your own style), converting video to Flash will be the best option. If you are running Mac OS, Doremisoft Mac Flash Video Converter will be a very good choice. With this best Flash Converter for Mac, you can easily convert video to Flash with customized player and share your videos on your own website, blog and social sites such as Facebook and MySpace.


The following easy steps will guide you on how to convert video to Flash on Mac OS with Doremisoft Mac Video to Flash Converter:
Step 1: Add videos to Video to Flash Converter for Mac
Click on the “Add Video” button to browse your Mac hard drive and add the videos you want to convert to Flash to the program.

Step 2: Start to convert video to SWF
If you don’t want to edit your videos before conversion, you can now just click the Start button to start the conversion. When the conversion is done, click “Find target” on the bottom of the main interface and you will find all the converted contents. Each video will be converted into a folder named after the original file name. The folder contains the converted Flash SWF of the original video and some other files that enable you to easily share the converted Flash. And now you are ready to upload your Flash files to your website.
However, before the conversion, Doremisoft Mac video to Flash converter provides various options to let you edit and customize your video.
Edit Video
Click on the “Clip” button, and you can trim the length of your video file to only keep the part you want.
Click on the “Edit” button and you can crop video to remove redundant video sides, edit video brightness, contrast and saturation and apply a special video effect to your video.
Customize video and Flash Player
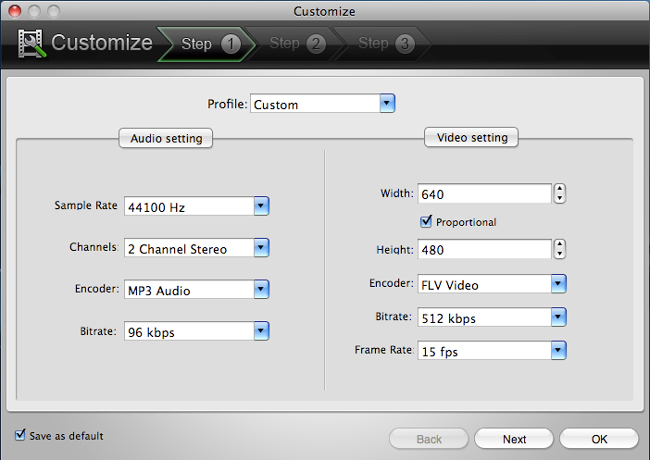
You can set various output parameters and also customize your Flash player. Click the “Customize” button and:
1. Set video and audio parameters to meet the needs of your website, blog or social network .
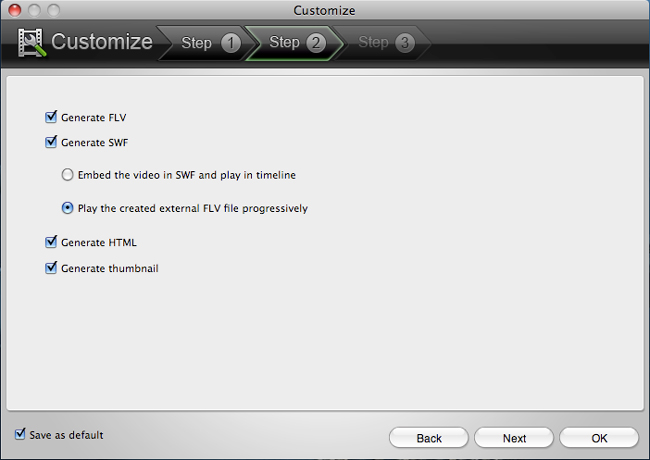
2. Click “Next” to choose what files you want to generate. You may just keep the default options.
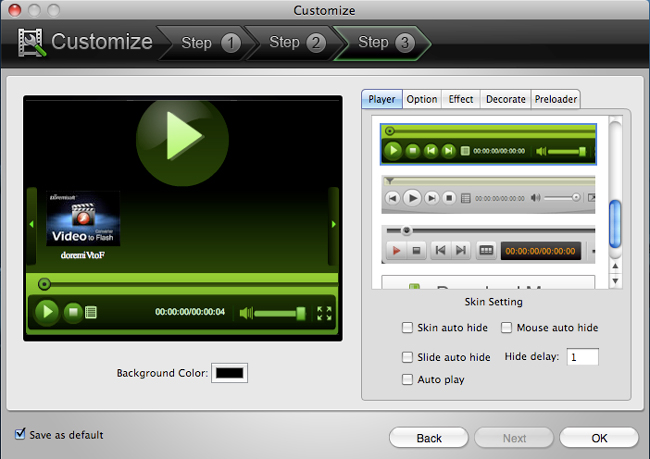
3. Click “Next” to customize your Flash player and make it your own style.
Upload Flash to your website
After the conversion, you can starts uploading the converted Flash files to your website. As above-mentioned, you can find one output folder for each added video. A folder has all the files you need to put flash video on your blog or website.
Let take an example: in a folder “Europe”, you will see “: AC_RunActiveContent.js, europe.flv, europe.html, europe.jpg and europe.swf.”Now, you can either directly upload your Flash to your website or embed your Flash to an existing page.
When you upload all these files to www.yourwebsite.com/2010trip/, you can then directly view your video “europe” at www.yourwebsite.com/2010trip/europe.html
To embed this video to an existing page, you can right click on the europe.html file and open it as a txt file, then copy and paste the source codes from “<object classid=” to “</object>” to the source codes of the page where you want the video “Europe” to be played.
Flash Products
Relation Guides
-
{relationguides}