Video to SWF Converter for Mac
Whether you are a regular user who wants to share your videos on your blog or you are a professional website master and you want to put videos on your website, you will need a conversion tool to convert videos to Flash, because most video materials will come in other formats such as MOV, M4V, 3GP, MP4, AVI, WMV, RM, RMVB, MKV, VOB, MPG, MPEG to SWF or FLV. For Mac users, Doremisoft Video to Flash Converter for mac is one of the best video to SWF converters for Mac and it provides the very solution to video to SWF conversion with excellent output quality and excellent editing functions to edit your videos before converting them. ![]()
![]()
After you download this Video to SWF Converter for Mac, install and launch the program. Then follow the steps below to convert video to SWF and get ready to upload your videos to your blog or website.
Step 1: Add videos to Video to Flash Converter for Mac
Click on the "Add Video" button to locate the videos you want to convert from your Mac hard drive and add them to the program.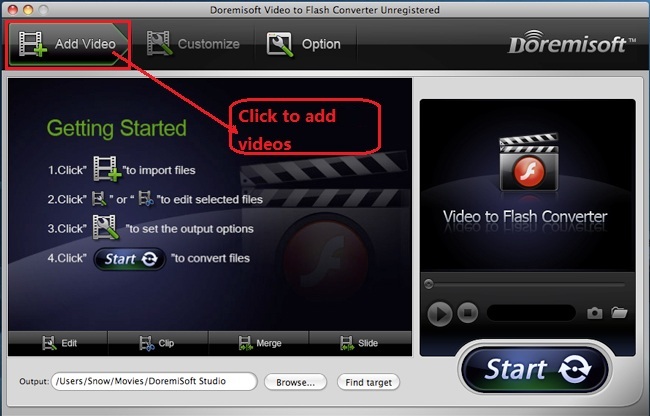
Step 2: Trim video length (Optional)
If you do not want to convert the whole video, you can trim it and only keep the part you want. Click on the "Clip" button and drag the two slider buttons trim the length of your video.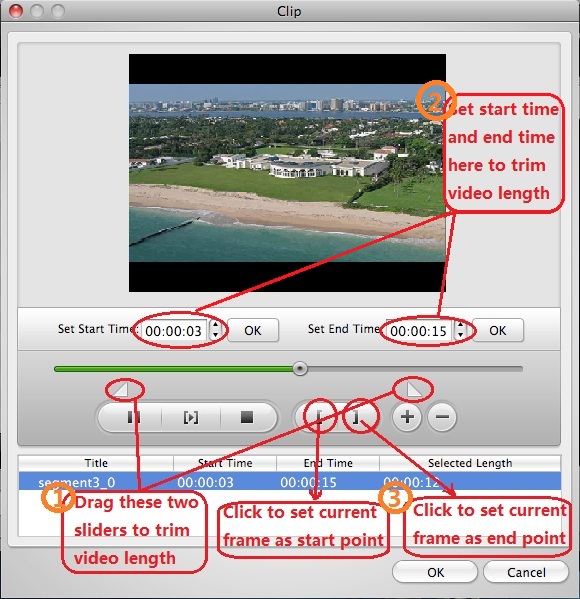
Step 3: Crop your video (Optional)
Click on the "Edit" button and you will see the window where you can crop/zoom in your video by dragging the crop frame.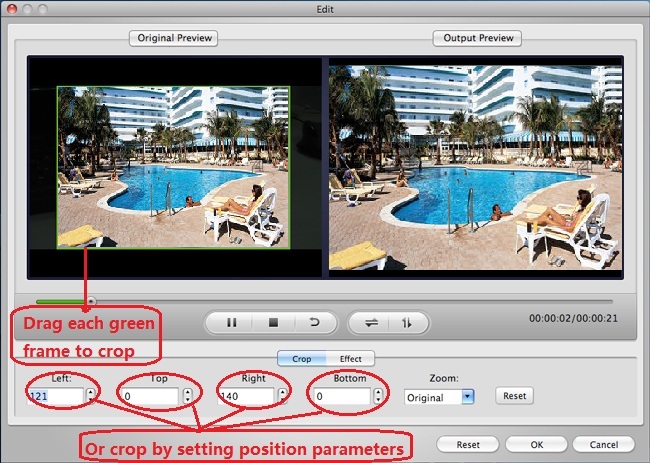
Step 4: Edit your video (Optional)
Click the Effect tab at the Edit window to edit video brightness, contrast and saturation and apply special video effects such as grey, emboss and old film.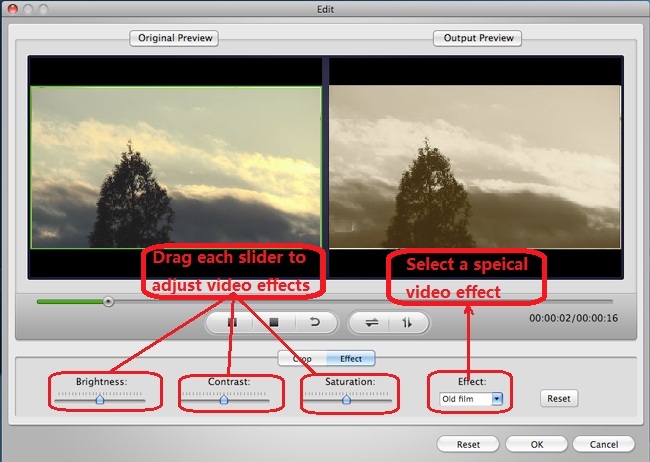
Step 5: Video customization (Optional)
Before you start to convert video to SWF, this video to SWF converter for Mac also lets you set various output parameters and even customize your Flash player. Click the "Customize" button and follow the steps below to do the customization:
1. Set the video and audio parameters according to what’s required by your blog or website.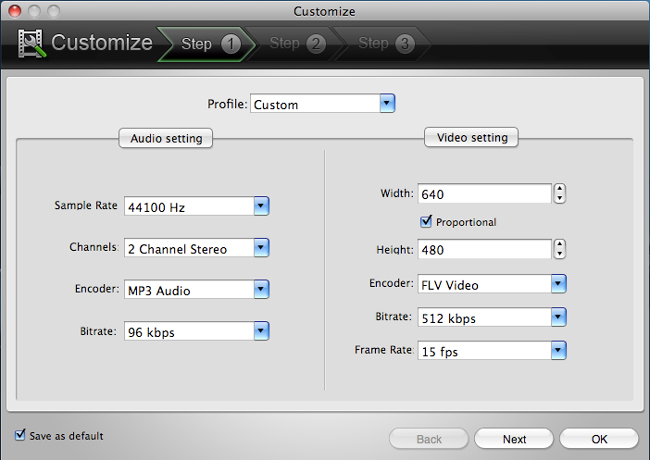
2. Click "Next" and you can check what and how you want to create your Flash files. For most users, keeping the default options at this step will work just fine.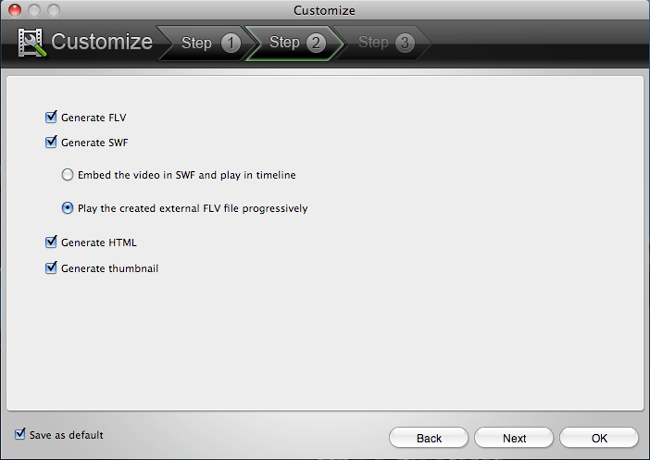
3. Click "Next" to customize your Flash players for each added video.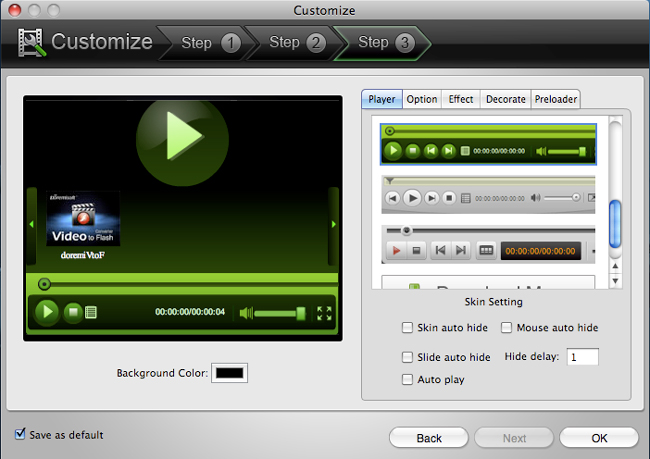
Step 6: Start to convert video to SWF
After the above operations, you can just click the "Start" button to start the video to SWF conversion. After the conversion, you can click on "Find target" on the bottom of the main interface to open the output folder and look for the final SWF files. In the output folder, you can see multiple folders named after each file name. Open each folder and you will find the final contents for each converted file, including the SWF files.
Upload your SWF to the web
Each folder contains all the files you need to put the converted video on your blog or website. Let take an example: in a folder "myfloriaholiday", you will see ": AC_RunActiveContent.js, myfloriaholiday.flv, myfloriaholiday.html, myfloriaholiday.jpg and myfloriaholiday.swf."
If you upload all these files to www.yourwebsite.com/holidayvideos, and you can then directly view your video at www.yourwebsite.com/holidayvideos/myfloridaholiday.html
You can also embed this video to an existing page. To do this, open the myfloridaholiday.html file with a txt file, then copy & paste the source codes from "<object classid=" to "</object>" to the source codes of the existing page where you want to embed this video.
Now you have successfully converted video to SWF using Dorimesoft Mac Video to SWF Converter and uploaded your videos to your blog or website!
Flash Products
Relation Guides
-
{relationguides}
